Inspired by Fall

My good Doubledog Dare stamping buddy, Anne (Itsapassion), was the hostess for the Inspiration Challenge over on Split Coast today and she asked me, along with some other of the DDC team, to make a card for her to link to the challenge as an example. She showed us a wonderful web store of beautiful ceramic creations.

Since I love bringing flowers from my garden into the house, I took a look at the vases and found this pretty leafy one, perfect inspiration for this fall season!

And here is my inspired card. I used a woodgrain designer paper from Dream Street Papers for the background to mimic the look of the vase. I embossed it with the Distressed Stripes Cuttlebug folder but I don't think you can see that in the picture. It adds a little dimension IRL!

I stamped the label, cut it out with my Labels Four Nestability and then cut out the center with my Petite Oval Nestability. I stamped the sentiment on the oval and adhered it right onto the DP. I layered the frame over the sentiment with foam dimensionals.

I stamped a bunch of the leaves with several colors of ink, using the rock and roll technique on some of them (ink the stamp with one color, then rock and roll the edges on another color). I bent each leaf a little and attached them over the frame with foam dimensionals - adding a vintage wood button knotted with twine to the centers.

I rounded the corners and knotted the ribbon around the bottom edge. I was really pleased with how this came out!

The stamps I used are all from Waltzingmouse. The label/frame is part of the Very Vintage Labels #4 set (this set is presently sold out but Claire is keeping a wait list so get yourself on it!) and the leaves and sentiment are from the Blessed by You set.

Check out Claire's blog - she's doing sneek peaks for her soon to be released new stamp sets - and one of them is a secret set you'll need a password to get to see - how mysterious!!!!??? what's that all about???

Stamps: Waltzingmouse Stamps - Very Vintage Labels #4, Blessed by You

Paper: Vintage cream, Bazzill Basics Brown, DP - Dream Street Papers/Sam

Ink: Adirondack - Lettuce, Watermellon, Hazelnut, Sunset Orange, Memento Tuxedo Black

Accessories: twine, Melon Berry Double Stitched Ribbon, vintage buttons - PTI, glue dots, foam dimensionals, Zutter Corner Punch, Labels Four and Petite Ovals Nestabilities, Cuttlebug Distressed Stripes Folder,

Traditional Thanksgiving

Hi all.  I just wanted to show you the set of Thanksgiving cards I made for my dear friend, Juanita.  She loves the muted colors of fall and a more traditional feel, so this is what I came up with for her.  :O)

Happy Hallow's Eve!

A Plum of a Thanksgiving

We are going to my husband's brother's in Vermont for Thanksgiving this year and I wanted to bring along some thank you gifts. I bought this plain glass bottle Warm Apple Pie Fragrance Diffuser thinking that I would decorate it somehow. Today's Ways to Use It challenge on Split Coast was to use purple on a project and the Moxie Fab World challenge this week is to Capture the Essence of Plum so these two challenges were my inspiration for my decorating colors. I colored this wonderful fruit image by Waltzingmouse Stamps with Prismacolor Watercolor Pencils and Gamsol, cut it with an oval Nestability and layered it to a scalloped oval Nestability. I wrapped a band of dotted designer paper around the bottle that I punched with an EK Success scalloped lacey punch. I layered a piece of Plum Pudding satin ribbon over the band.

I tied a piece of Plum Pudding saddle stitched ribbon arond the neck of the bottle. The sentiment, also from the Peace & Plenty Waltzingmouse set, is punched with a Labels Trio Spellbinders die. To give the image a little dimension - I attached a few dew drops to the grapes and the pumpkin.
I think this will look quite decorative on a side table for the Thanksgiving season don't you? ..... and it smells like apple pie - what more could you want!?!

Stamps: Waltzingmouse - Peace and Plenty
Paper: white, plum pudding - PTI
Ink: Memento Tuxedo Black, Plum Pudding - PTI
Accessories: sponge, Prismacolor Watercolor Pencils, Gamsol, oval & Scalloped oval nestabilities, tag trio Spellbinders, Satin & Saddlestitched Plum Pudding Ribbon - PTI, scalloped EK Success punch, scor tape, dew drops, foam dimensionals, glue dots, Frangrance Diffuser.

Sneaky Peekin' for Sassy Studio Designs

Hello all!  I wanted to show you a new template that will be released on Nov. 1 at Sassy Studio Designs.  It's a Snow Globe card template that comes with an extra sheet for the layering pieces.  Just print and cut!  Easy peasy!
I made the globe part of mine out of acetate and put the snowman, flakes and some glitter inside the 2 pieces.  I was going to make a shaker, but my creative design team sister, Piali, already did it!  :O)

Simply Christmas & The Bread of Life

I made these Christmas cards for the October Papertrey Guest Stamper challenge to make a Clean and Simple Holiday card.

This card is simply a panel of card stock, a 2/3rd's panel of designer paper, a ribbon tied along the edge with the sentiment stamped directly on the cardstock - accented with one dew drop and corners rounded!

Stamps: Signature Christmas: PTI
Paper: White, Scarlet Jewel, Holiday Cheer: PTI
Ink: Memento Tuxedo Black
Accessories: Dew drop, glue dot, Scarlet Jewell extra fine polka dot satin ribbon- PTI, corner rounder.

And here is a no layer card where I just stamped the damask and greeting right on the cardstock. I accented the damask with a few gems and outlined the card with a black Micron pen!

It would be easy to make lot's of these cards in no time at all!
Stamps: Damask Designs, Signature Christmas - PTI
Paper: New Leaf - PTI
Ink: Enchanted evening - PTI
Accessories: Rhinestones - PTI, corner rounder, black micron pen

I made this 6x6 page for Week 20 of the His Holy Name Challenges on Split Coast - God's attribute for this week was Bread of Life. I chose John 6:35 to illustrate this attribute that I printed on the computer and cut with the Labels Three Nestability. I used the MojoMonday sketch from last week. I liked the earthiness of the Cosmo Cricket papers and chipboard pieces and thought they accented the idea of Jesus being one of the basic things in life we need to survive.

Stamps: none
Paper: vintage cream, dark chocolate - PTI, DP - Cosmo Cricket Earth Love/reuse
Ink: none
Accessories: computer generated verse, oval punch, window frame punch - SU, cosmo cricket ready set chip/Earth love, Alpine ribbon - SU, Nestabilities Labels Three

Fluttering By with Zindorf Style!!!

Good morning all you crafty people!  I'm back in action with Flutter By Wednesday #81!  This week is another open week...just use a butterfly, fairy or angel on your creation.  :O)

I actually used a dragonfly, but it's pretty close to a  butterfly if you ask me!  I made this card using a brayering technique by Michelle Zindorf.  I got to catch up with my gal pal, Peggy yesterday, and she showed me how to do this properly.  If you remember, I tried one of these several months ago and it didn't come out looking anything like this!  I'm tickled as can be with it...what do you guys think???


I hope you enjoy my card this week! Be sure to check out the rest of the design team's creations! Ann, Cassie, Chris, Christine, Danni, Harriet, Heather, Jodi, Kristie, Michelle, Nancy, Nicola, Stef & Taylor.

Believe and Hope and Pics of the Fair

Gosh - I had such a busy weekend - our church fair was Fri and Sat (see pics at end of this post!) - then DH and I went to a coffee house to see two Irish singers Sat night, and then I had church this morning - BUT of course, I still had to stamp!

So here are two projects I did combining several challenges this weekend.
The featured stamper today was Rachelhope13 - I had not been in her gallery before so it was fun checking out all her cards! I finally chose this plaid stocking card to case.

I used a different stamp, made my own plaid background panel with stamps, tilted the image panel and lowered the ribbon!

For my ribbon - I used the buttony bow technique that Joanne created . She is offering a chance to win blog candy if you link a card using this technique - you can see her video tutorial here ETA: Joanne picked my card as one of her 10 favs!

I have been wanting try out my new Waltzingmouse Offbeat Background stamps to make a plaid background so caseing this card was the perfect opportunity. First I stamped the plaid horizontally using scarlet ink - then I stamped it vertically using blue ink. I machine stitched around this piece. I paper pierced around the image panel - and the stocking itself has a stamped stitched edge as do all the stamps in this set (that makes it easy huh!?!)

I distressed around all the edges and sponged them with So Saffron ink. I layered the stocking image - first stamping it on the white panel - then on scarlet and two different designer papers - cutting out pieces and layering them over each other using foam dimensionals.
Stamps: Waltzingmouse Stamps: Off Bead Backgrounds, Sewing Box Christmas
Paper: white, Spring rain, scarlet jewsll - PTI, DP - SU
Ink: Memento Tuxedo Black, so saffron - SU, Spring raind, Scarlet Jewell - PTI
Accessories: sponge, sewing machine, saddle stitched spring rain ribbon - PTI, twine - PTI, vintage button - PTI, paper piercer - SU, circle punches, foam dimensionals, distresser - Heidi Swapp

My second project is actually a 6x6 page that I made for the His Holy Name challenges that I do every other Sunday. See my side bar for a link.

You can find Patter's challenges here in the SCS forums God's attribute for week 19 was The Word. I chose Psalm 130:5 to illustrate the word for my page today.

I thought this image block from Cosmo Cricket Earth Love designer paper fit it beautifully. I can just feel God's breezes swirling around this girl - waiting for the Lord on this hilllside - can't you??

I used Friday's Taylored Expressions sketch for this page as well as Sharon's no time to stamp challenge to make a square card and only use square corners. (Round embellishments are ok so I think it was ok to have curvy shapes on the dp?!)
Stamps: none
Paper: vintage cream, new leaf: PTI, DP Cosmo Cricket Earth Love/elements/relive/ reuse
Ink: none
Accessories: square punch
And finally - here are some pics from our church fair - we had a full house crowd on Friday night and I forgot to take pictures we were so busy! So these were taken Saturday morning just as we opened - we didn't have as big a crowd on Saturday but there was a steady trickle of people luckily!
Here are Lillian, Dot and Sandy - displaying all the wonderful hand knit items people donate for us to sell.
Here's Cathy and her granddaughter - selling what's left on the Home Backed Goods table. You couldn't even see the tablecloth on Friday night!

Some of the ladies put together various themed baskets (kids, wine, bath and body, etc) for a raffle. Here's Linda ready to sell tickets! Our Country Store table is in the background - here we sell bakery bread, home made baked beans, corn chowder, fresh popped pop corn, canned jellies, relishes and Apple Cider.
Here's me, Jeannine, and Elizabeth at our D'Vine Cards Table - where we sell hand stamped cards and crafts. Jeannine got us these cute autumn aprons at Joanne's for us to wear. We are all a little exhausted!
Dale and her daughter and friend Peggy make holiday gifts/decorations all year long to sell at this packed table!
Here's a shot of the main hall - we also have a sncak bar and Attic Treasures room downstairs.

And here's Jane selling what's left at the jewelry table - The crowds flock to this table first on Friday night - hoping to find that million dollar gem that someone gave away not realizing the value of it!!!

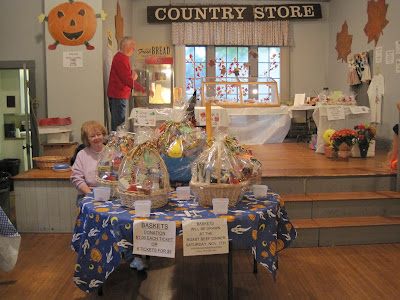
And finally - here are 6 year old twins, Paige and Gweneth with mum, Elizabeth. They were a great help to us at our card table - putting sales in the bags and giving out change - they love to stamp too! I didn't know that Elizabeth snapped this picture with my camera - I found it when I down loaded the others - It was a fun surprise - as well as a great picture!!

If you are still here reading this (!!!! ) ... thanks for sticking with me through this long posting!!!

Ghostie Peep Treat Box & a Skull Jar !

Ok, so I lied - I'm not quite done with Halloween projects!

My church fair is this weekend and I've been madly making little last minute crafts after work to sell at our stamping table where two friends and I (Hi - Elizabeth and Jeannine!) make cards and stamped crafts to sell.

The sentiments I used on these spooky treat boxes are from the Halloween Party stamp set by Waltzingmouse Stamps. I punched them with the Designer Label punch by SU.

These fun little box/stands are designed by Ana Wohlfahart but I think her scoring measurements were a bit off on her instructions.

Here is how I made mine: Basically the box is a 3" x 11" piece of cardstock. I scored along the 11" side at 1 1/2", 3", 4 1/2", 6" and then cut an oval (smallest petite oval nestability) on the section between the 1 1/2" and 3" score (2nd panel in). Next fold on all score lines, fold up the box part and adhere it with Scor tape to the back panel. Cut a piece of designer paper for the back panel - decorate as desired. I tied a ribbon around the base and sponged a little white ink around it.

Here's my little army of ghosts! I wrapped up the ghost Peeps individually in Saran Wrap and placed them inside the oval cutouts- I think they look so cute peeking out here! I adhered some fabric bats, ghosts and pumpkins in the corners - they were left over from the supply Joanne (sleepyinseattle) had given the Doubledog Dare challenge team this week to use to make a Halloween card.

So here's my little bucket of 12 treats ready to go home to some little trick or treater for Halloween - don't they look spooky/cute!?!

Stamps: Waltzingmouse - Halloween Party
Paper: Basic Black, DP - SU
Ink: Memento tuxedo Black, Smokey Shadow, Fresh Snow
Accessories: sponge, zesty orange twill ribbon: PTI, petite oval nestability, designer label punch: SU, glue dots, foam dimensionals, punched witch (unknown), fabric bat, ghost, pumpkin (unknown), Scor pal, Scor Tape
I made these cute jars the night before the fair - I just happened to stop into Michael's and they had this Martha Stewart Skull punch on sale ($9.99 marked down from $17.99!) So I brought it into my craft room and saw these 5 little jars sitting on the floor - left over from an Easter project last spring!
I just happened to also have a bag of this chocolate candy corn and the whole design came to mind. Here's a close up of the front view. I sponged the skull with Smokey Shadow Ink.

After I punched the skull, I realized that I needed something behind the eyes and mouth to make them stand out - so I punched an orange circle - then the base needed to be bigger to cover the jar top - so I tried the scalloped edge circle with black card stock. Then I just had to cover the rim with a coordinating ribbon and fill the jar with the candy! Another cute little treat!

Paper: White, Pumpkin Pie, Basic Black: SU

Ink: Smokey Shadow: PTI

Accessories: ribbon - PTI, glue dots, skull punch- Martha Stewart, circle punch, scallop circle punch: SU

Be Merry and Bright!

This week Dancerriley was the Featured Stamper over on Split Coast Stampers. I chose her pretty ornament card to case. I used a a different ornament stamp, different colors and a different nestability cut out - but the theme is basically the same.

The stamps I used are from the new Sewing Box Christmas (the ornaments) and Seasons of Love (the sentiments) stamp sets by Waltzingmouse Stamps . Both sets offer lots of possibilities for all your holiday card needs! You can check out Claire's wonderful samples on her blog.

For the ornaments - I stamped them first on avocado card stock and then again on designer papers. I cut out the center part from the DP's and layered them over the avocado stampings using foam dimensionals. I punched a hole for the loop and threaded gold ribbons through as hangers attaching the ends on the back of the panel. I slipped wider gold mesh ribbon under the hangers tying it in a knot on the side.For the sentiment inside the card - I adhered the center piece that was left from cutting the Labels Nine Nestability frame on the front of the card under the ornaments and stamped Merry Christmas directly on the Nestie cut out.


Caseing a card for the Featured Stamper challenge is so fun - I would not usually use so many patterns or have created such a busy card on my own - these kinds of challenges make you move out of your comfort zone and grow a little in your creating!

My church fair is this weekend (Fri and Sat) and I'll be selling at it both days as well as helping close it down on Sat afternoon - I'll have some pics to share with you after the weekend!

Stamps: Waltzingmouse Stamps - Sewing Box Christmas, Seasons of Love
Paper: PTI - white, ripe avocado, scarlet jewell, DP Holiday Cheer
Ink: Memento Tuxedo Black
Accessories: foam dimensionals, gold ribbons: PTI,, circle punch, Labels Nine Nestabilities

Dare to be Sassy Thursday & Breast Cancer Awareness


Hello everyone! Today I am posting the challenge over Sassy Studio Designs that started yesterday.  Sorry for the lateness...my computer seemed to have semi-crashed yesterday!  That was scary!  Hubby got home and fixed it up for me.  So, SSD's Dare to be Sassy Thursday this week is a sketch challenge.  The sketch was made by our very own DT member, Valerie!  Be sure to head over and join in with us...all you need to do is use an SSD image and the sketch!  :O)


Also, for those of you who have had Cancer of any form touch you, a friend or a member of your family, we have special images in the store for you.  
"I'm a Survivor"


"Support a Cure"

Lindsay will donate $1 of each sale to the American Cancer Society and through October she will match every dollar!  That is stellar!  Get over and pick yours up today!

Mindful of Your Troubles - and One More Spook

This card combines two Split Coast Challenges - the clean and simple challenge to make a sympathy card and the color challenge - to use burgandy, coral and vanilla.

My card is 4 1/4 x 4 1/4 and it went together pretty quickly - which is the goal of a clean and simple card, right?! I stamped the label - cut it with a Labels Four Nestability (that fits it perfectly!) stamped the sentiment inside the oval and layered it onto a piece of designer paper using foam dimensionals. Then I just added the pretty Prima flower with a glue dot. Easy peasy!

The frame stamp is from a set called Very Vintage Labels 4 from Waltzingmouse Stamps (it's presetently sold out but Claire is putting names on a waiting list ) and the lovely sentiment is from a set called Blessed by You - check out all the great sentiments and images on this set!

Stamps: Waltzingmouse Stamps: Very Vintage Labels 4, Blessed by You
Paper: Vintage Cream, Text Style Holiday Cheer: PTI
Ink: Memento tuxedo black, Cameo Coral: SU
Accessories: foam dimensionals, Prima flower, glue dot, Labels Four Nestability
This may be my last Halloween card for the season (but then again.......)

Joanne (Sleepyinseattle) was our hostess this week for the Doubledog Dare Challenge. She sent us a bunch of fun Halloween stuff to use on a card. I only used a little bit of it - the ghost, the witch, the moon and the bats. (I'll be able to make about 10 more cards with everything she sent us - how fun! - thanks Joanne!)

The black panel is cut with an inverted scalloped square Nestability - the sentiment, ghost and witch are all up on foam dimensionals. This is another 4 1/4 x 4 1/4 size card. (I love this little square size!) and I had the ghost's tail stick off the side a little bit so it really looks like he's flying in front of the card!

The spooky sentiment is from the Halloween Party stamp set by Waltzingmouse Stamps

We'd love to have you join us by making a Halloween card too! - just put DDC in the keywords when you load your card onto Splitcoast!

Stamps: Waltzingmouse Stamps: Halloween Party
Paper: Basic Black: SU, White, Summer Sunriese : PTI
Ink: Memento Tuxedo Black
Accessories: classic inverted scalloped square Nestability, cut outs: unknown, foam dijmensionals, small oval punch: SU

Oh Christmas Tree

The Limited Supplies challenge on Split Coast a while ago was to use a Christmas tree on your card. I tried to keep the supplies limited but I was also doing Taylor's sketch for that week on this card so it ended up with more than a few layers!

I used a circle and pinking circle nestability to frame my image and two Cuttblebug folders, the snowflake and Swiss Dots. The sentiment by Rubber Soul was punched with the Word Window punch from SU.

At least my bare little Amuse tree has limited decorations on it! (and check it out - it's on sale!)

Thanks for stopping by today!

Stamps: bare tree: Amuse, sentiment: Rubber Soul
Paper: spring moss, sweet blush, aqua mist, vintage cream: PTI, DP My Minds Eye-Be Merry Trim the tree
Ink: memento tuxedo black, Spring Moss: PTI
Accessories: Copics: E09, E35, sponge, dew drop, glue dot, foam dimensionals, word window porch: SU, Snowflake and Swiss Dots Cuttlebug Folders, Circle and Pinking Circle Nestabilities, Dotted Swiss Sweet Blush Ribbon: PTI

Flutter By Wednesday #80!

Hello all you happy crafters!  Another Wednesday is upon us and that means another Flutter By Wednesday over at Danni's Dreams!  Woohoo!  All you have to this week is use a butterfly or a fairy on your creation.  I went super simple this week after I found this beautiful paper yesterday at Hobby Lobby.  The sentiment says "THE BEAUTY OF FRIENDSHIP IS NOT THE OUTSTRETCHED HAND, NOR THE KINDLY SMILE...IT'S THE SPIRITUAL INSPIRATION THAT COMES WHEN YOU DISCOVER THAT SOMEONE ELSE BELIEVES IN YOU AND IS WILLING TO TRUST YOU WITH THEIR FRIENDSHIP."  :O)

CARD RECIPE
Size:  5x7
Stamp:  Hero Arts
DP:  Paper Studio
Cardstock:  Bazzill
Misc:  CTMH chocolate ink, rhinestones from stash

I hope you enjoy my card this week! Be sure to check out the rest of the design team's creations! Ann, Cassie, Chris, Christine, Danni, Harriet, Heather, Jodi, Kristie, Michelle, Nancy, Nicola, Stef & Taylor.

A Tiled Christmas Tree

This is a picture of the pretty tile from the Xenia Taler web store that inspired my card for Saturday's Inspiration Challenge over on Split Coast. It instantly made me think of this fun tree stamp from the new Sewing Box Christmas set by Waltzingmouse Stamps. If you are into folk art and/or sewing or just that home spun look - this is the set for you!I stamped the 'ornaments' on colored card stock, punched them with a circle punch - then layered them on the tree with foam dimensionals after sponging the edges. I paperpieced the base with card stock. The Faux stitched border is from another Waltzingmouse Stamp set called Off Beat Backgrounds (check out the fun stamps in that set!) I distressed the edges of the top panel and used some silver ice stickles on the star for a little spot of shimmer.
Inside my card I stamped a pretty sentiment from the Seasons of Love set as well as the stitched heart from the Sewing Box Christmas set. I may go back and color that in yellow to match the front of the card now that I'm looking at it here!!

Stamps: Waltzingmouse Stamps: Sewing Box Christmas, Off Beat Backgrounds, Seasons of Love
Paper: White, Enchanted evening, Lemon Tart, Summer Sunrise - PTI, Sahara Sand - SU
Ink: Sahara Sand - SU, Enchanted Evening - PTI
Accessories: foam dimensionals, circle punch, sponge, distresser - Heidi Swapp, Silver Ice Stickles

Luminaries, Taylored Expressions Challenge

Hi everyone and happy Tuesday!  It's dreary and rainy here in Kansas today.  I thought I should come visit all my crafty people and show you what I've been up to.  Today I have a very quick and easy way to decorate for Halloween or any occasion!  If you have vellum, ink and a stamp, you can do this too!  I made this luminary to go out on the front steps for Halloween.  How cute is this???  I used the Evil Sorceress and bats digital images by Sassy Studio Designs.  I just arranged them, printed them out on vellum (2 per page), color in black and tape the edges together.  Add your tea light and voila!  Easy peasy and oh-so-cute!  This would work for traditional stamps as well!

Next up I joined in at Taylored Expressions for the sketch challenge.  This is my first time playing over there and I'm wondering why!  I loved the sketch and I will be returning, for sure!  Here is Taylor's sketch and my take on it...


I am going to do my best to start listing what products I used in my creations.  I used to do it and then I got lazy.  *sheepish grin*  Paper is the worst since I have soooooooo many scraps.

CARD RECIPE
Size:  5x7
Sketch:  Taylored Expressions
Stamp:  Sassy Studio Designs (released Nov.1)
DP:  stash
CS:  stash
Misc:  Copic markers, Spica clear glitter marker, CM personal cutting system, MS border punch, Paper Studio rhinestones, clear sticker sentiment from stash

A Spooky "Twilight" Kind of Love and Monkeying Around!

Happy Monday everyone!  I'm bright eyed and bushy tailed this morning, so I thought I'd pop on and show you a different kind of card for me.  Aisne of Aisne's Creations is a talented artist from South Africa who specializes in 3D graphics.  These are already colored in and ready to use on cards, layouts, etc and can be found at Digiscrap Station.  I saw her Dracula and Noir and thought they would be a perfect replica of Edward and Bella.  :O)  The sentiment says "A SPOOKY KIND OF LOVE"  What say you?


Next up, I have monkeys from Dustin Pike's last release.  I know release day is on Thursday, but I forgot to post them here for you!  Slacker, I know!  ;O)